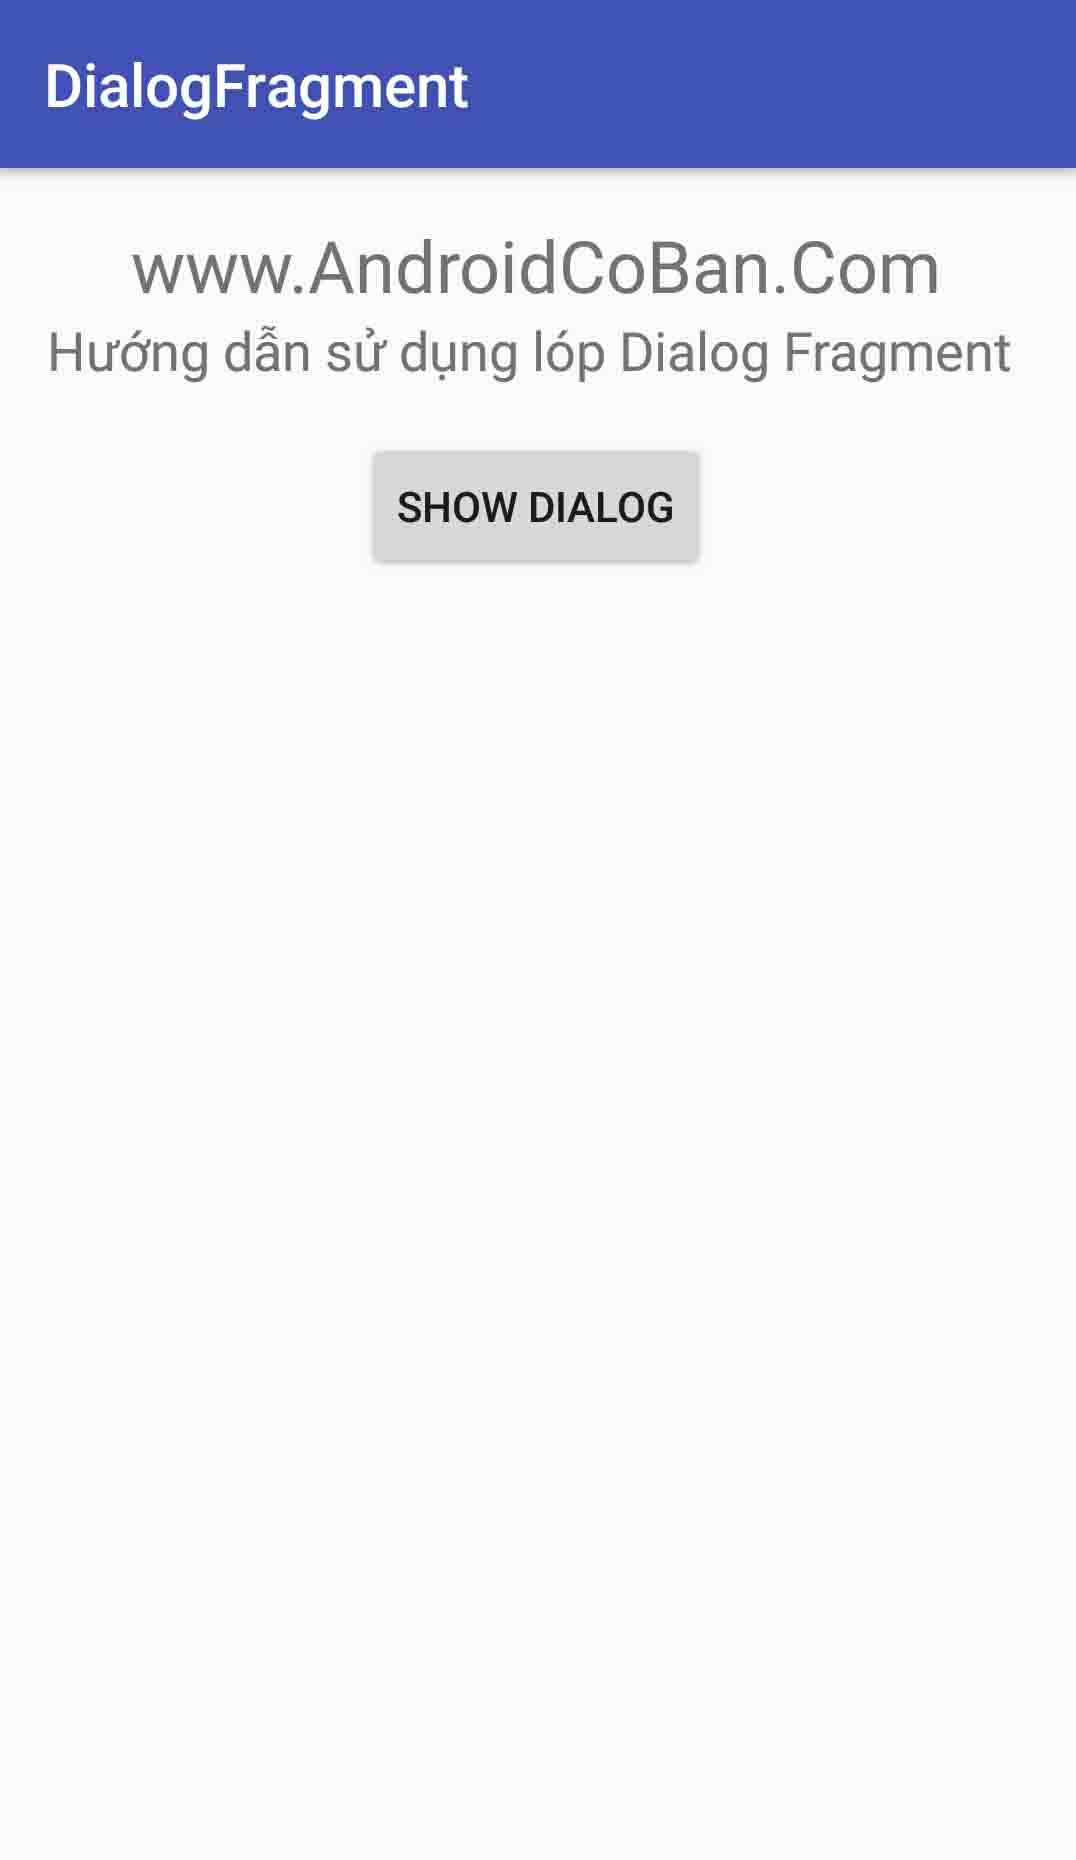
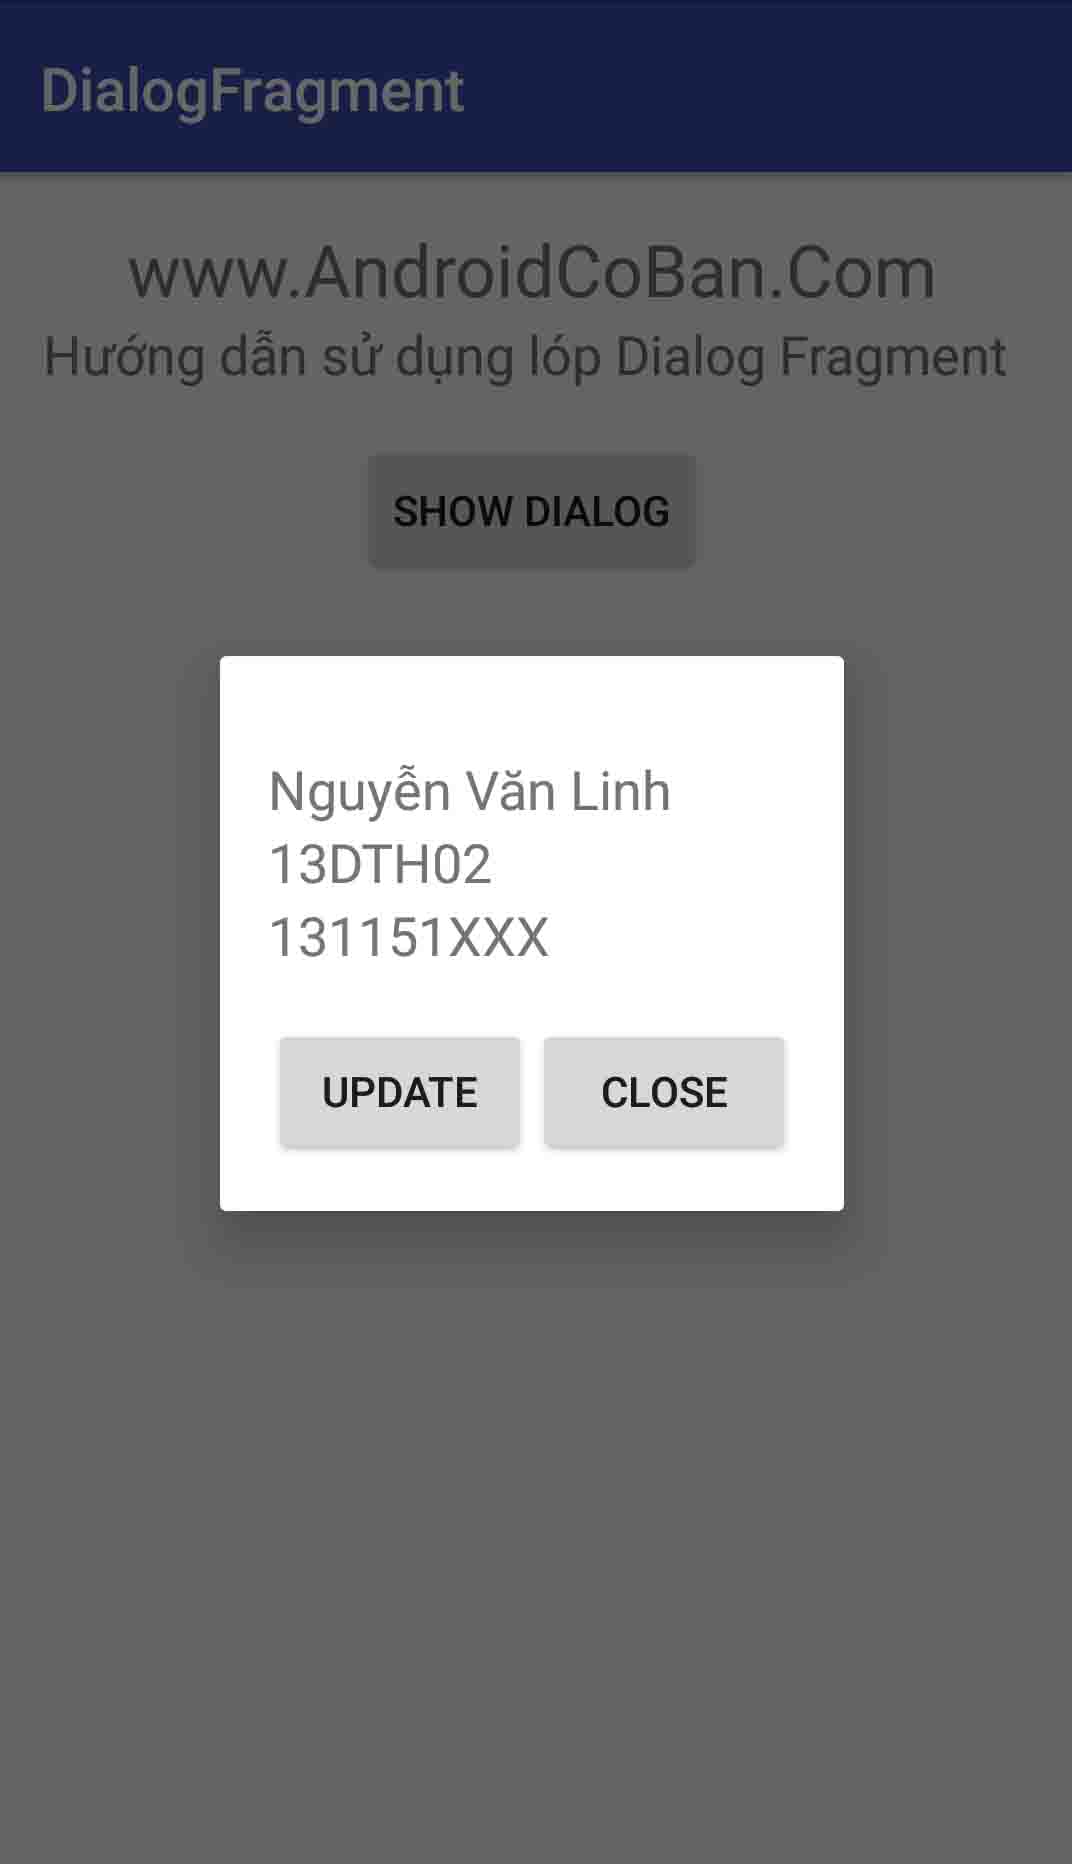
1.Giới thiệu
Dialog là dạng cửa sổ cho phép người dùng có thể nhập thông tin hoặc xử lý sự kiện.
Ví dụ khi người dùng thoát ứng dụng hoặc xóa dữ liệu ta cần đưa ra một cửa sổ nhỏ để xác nhận thông tin lại lần cuối.
Trong bài viết này tôi sẽ hướng dẫn các bạn sử dụng lớp Dialog Fragment cho phép tùy chinh và khả năng sử dụng cao hơn Dialog bình thường.
2. Cách sử dụng
Có 2 cách để sử dụng lớp này khi tạo một DialogFragment là onCreateView hoặc onCreateDialog.
Sử dụng onCreateView khi hộp thoại sẽ được xác định thông qua một layout XML.
Sử dụng onCreateDialog khi bạn chỉ cần để xây dựng và cấu hình một lớp Dialog tiêu chuẩn (như AlertDialog).
3. Tạo một và sử dụng Dialog Fragment tổng quát.
Đầu tiên tạo một layout: custom_user_info.xml
<?xml version="1.0" encoding="utf-8"?>
<LinearLayout xmlns:android="http://schemas.android.com/apk/res/android"
    android:orientation="vertical"
    android:layout_width="match_parent"
    android:layout_height="match_parent"
    android:padding="@dimen/activity_vertical_margin">
    <TextView
        android:layout_width="match_parent"
        android:layout_height="wrap_content"
        android:text="Name"
        android:textSize="18sp"
        android:layout_marginTop="@dimen/activity_vertical_margin"
        android:id="@+id/tv_name"/>
    <TextView
        android:layout_width="match_parent"
        android:layout_height="wrap_content"
        android:text="Class"
        android:textSize="18sp"
        android:id="@+id/tv_class"/>
    <TextView
        android:layout_width="match_parent"
        android:layout_height="wrap_content"
        android:text="MSSV"
        android:textSize="18sp"
        android:id="@+id/tv_mssv"/>
    <LinearLayout
        android:layout_width="match_parent"
        android:layout_height="wrap_content"
        android:paddingTop="@dimen/activity_vertical_margin"
        android:orientation="horizontal">
        <Button
            android:layout_width="0dp"
            android:layout_height="wrap_content"
            android:layout_weight="1"
            android:id="@+id/btn_update"
            android:text="Update"/>
        <Button
            android:layout_width="0dp"
            android:layout_height="wrap_content"
            android:layout_weight="1"
            android:id="@+id/btn_close"
            android:text="Close"/>

    </LinearLayout>
</LinearLayout>
Tiếp tục tạo một file UserInfoDialog.java extent lớp DialogFragment
public class UserInfoDialog extends DialogFragment {
    TextView tvName;
    TextView tvClass;
    TextView tvMSSV;
    Button btnUpdate;
    Button btnClose;

    //Được dùng khi khởi tạo dialog mục đích nhận giá trị
    public static UserInfoDialog newInstance(String data) {
        UserInfoDialog dialog = new UserInfoDialog();
        Bundle args = new Bundle();
        args.putString("data", data);
        dialog.setArguments(args);
        return dialog;
    }

    @Override
    public View onCreateView(LayoutInflater inflater, ViewGroup container,
                             Bundle savedInstanceState) {
        return inflater.inflate(R.layout.dialog_user_info, container);
    }

    @Override
    public void onViewCreated(View view, @Nullable Bundle savedInstanceState) {
        super.onViewCreated(view, savedInstanceState);
        // lấy giá trị tự bundle
        String data = getArguments().getString("data", "");
        tvName = (TextView) view.findViewById(R.id.tv_name);
        tvMSSV = (TextView) view.findViewById(R.id.tv_mssv);
        tvClass = (TextView) view.findViewById(R.id.tv_class);
        btnClose = (Button) view.findViewById(R.id.btn_close);
        btnUpdate = (Button) view.findViewById(R.id.btn_update);
        tvName.setText(data);
        tvClass.setText("13DTH02");
        tvMSSV.setText("131151XXX");
        btnUpdate.setOnClickListener(new View.OnClickListener() {
            @Override
            public void onClick(View view) {
                Toast.makeText(getActivity(), "Update clicked!", Toast.LENGTH_SHORT).show();
            }
        });
        btnClose.setOnClickListener(new View.OnClickListener() {
            @Override
            public void onClick(View view) {
                getDialog().dismiss();
            }
        });
    }

}
Quay lại activity_main.xml tạo giao diện như sau:
<?xml version="1.0" encoding="utf-8"?>
<LinearLayout xmlns:android="http://schemas.android.com/apk/res/android"
    xmlns:tools="http://schemas.android.com/tools"
    android:id="@+id/activity_main"
    android:layout_width="match_parent"
    android:layout_height="match_parent"
    android:paddingBottom="@dimen/activity_vertical_margin"
    android:paddingLeft="@dimen/activity_horizontal_margin"
    android:paddingRight="@dimen/activity_horizontal_margin"
    android:paddingTop="@dimen/activity_vertical_margin"
    android:orientation="vertical"
    tools:context="com.lynkdev.dialogfragment.MainActivity">

    <TextView
        android:layout_width="match_parent"
        android:layout_height="wrap_content"
        android:text="www.AndroidCoBan.Com"
        android:gravity="center"
        android:textSize="24sp"/>
    <TextView
        android:layout_width="match_parent"
        android:layout_height="wrap_content"
        android:text="Hướng dẫn sử dụng lóp Dialog Fragment "
        android:gravity="center"
        android:textSize="18sp"/>
    <Button
        android:layout_width="wrap_content"
        android:layout_height="wrap_content"
        android:id="@+id/btn_show_dialog"
        android:layout_marginTop="@dimen/activity_vertical_margin"
        android:layout_gravity="center"
        android:text="Show Dialog" />
</LinearLayout>
Thiết Lập code cho MainActivity.java để hiện thị Dialog
public class MainActivity extends AppCompatActivity {
    Button btnShowDialog;
    @Override
    protected void onCreate(Bundle savedInstanceState) {
        super.onCreate(savedInstanceState);
        setContentView(R.layout.activity_main);
        btnShowDialog = (Button) findViewById(R.id.btn_show_dialog);
        btnShowDialog.setOnClickListener(new View.OnClickListener() {
            @Override
            public void onClick(View view) {
                //Show Dialog và truyền giá trị vào dialog
                // Các bạn có thể truyền cả object nếu muốn.
                FragmentManager fm = getSupportFragmentManager();
                UserInfoDialog userInfoDialog = UserInfoDialog.newInstance("Nguyễn Văn Linh");
                userInfoDialog.show(fm, null);
            }
        });
    }
}
Run app kiểm tra.
Link GitHub

